Shooting Custom Product Shots
In commercial product photography, there is a lighting/digital imaging trend that has endured for well more than a decade: rendering objects on a pure white background.
While there are many supplemental techniques you can add to this simple “silhouetted” treatment for a more modern feel — such as using different toned backgrounds, creating custom drop shadows, surface reflections, etc. — the basic concept remains the same and is ultimately still effective and commercially viable.
Rather than simply demonstrate how to shoot for a pure white background, though, this lesson demonstrates how to create the “pure black” background, polished reflections, and of course, professional-level lighting.
(Click on any thumbnail image below for an enlarged view.)
Topics Covered:
- The Concept
- Shooting on Plexiglas
- Setting Up Studio Lighting
- Creating a Full Black Background
- Adding a Custom Reflection
- Post-Production Edits
The Concept
For this lesson, I wanted to play around with reflections and decided to take a studio shot of my desktop computer and use some lighting techniques to make it look a little flashier. For reference, here’s a “before” snapshot of the computer on my office desk prior to the shoot. [Figure 1]
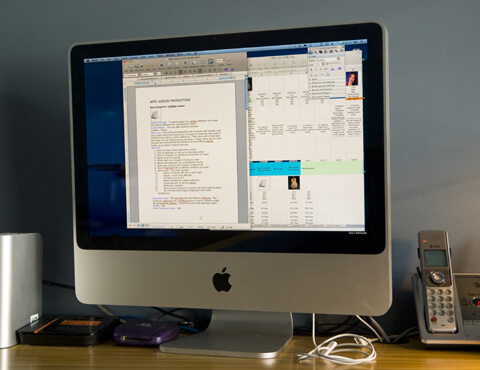
Figure 1
Rather than photograph the computer unplugged with a black screen, I decided to make it more interesting by powering it up and filling the screen with a recent image I had shot for another lighting lesson.
Figure 2
Coincidentally, this shot of my assistant jumping in the air was taken in the same spot as where I now had the computer set up. To see how the image on the computer screen was produced, you can check out the lessonhere.
Shooting on Plexiglas
For this shot, I wanted the computer to “pop” forward out of an all-black background, but I didn’t want it to simply look like it was floating in space. The solution then would be to make it look as though it was sitting on a black reflective surface. And the best way to do that was put it on an actual black reflective surface: Plexiglas.
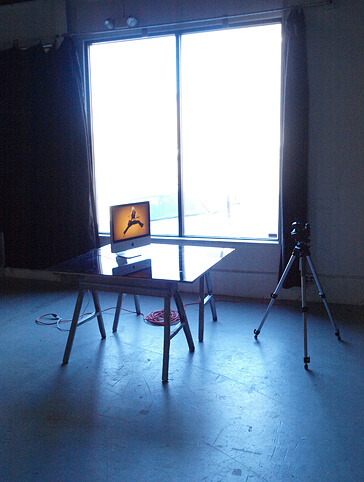
So I set up two saw horses and a 4×4′ sheet of plywood and placed a 4×4′ sheet of Plexiglas on top of it. I placed the computer on the Plexiglas, powered it up and opened the large studio windows next to the set to see what kind of effect natural lighting would provide. After mounting the camera to a tripod, I dialed in a shutter speed that would properly expose the light emitted from computer screen (1/5th of a second) and took my first shot. [Figure 3]
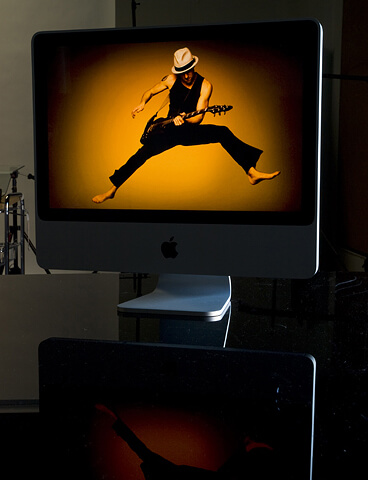
Figure 3
Setting Up Studio Lighting
As you can see from the result, some things were working and some things weren’t. While the light coming in from the windows lit up the side of the computer, it wasn’t enough to illuminate its front side. The shutter speed was set well to properly expose the image being projected from the screen, but it was also exposing the elements in the background, making for a distracting result.
To be able to control the lighting more effectively, I decided to use some strobe lighting units. First, I set up a StarFlash® 300 LiteDome® Kit and swapped out the LiteStand with a Boom and Boom Stand. To counterbalance the weight of the StarFlash strobe head and SoftBox, I hooked a RockSteady® weight bag to the other end of the boom. Once this light was balanced and powered up, I positioned the soft box so that it was directly over the computer and slightly angled to illuminate the front. [Figures 4 & 5]
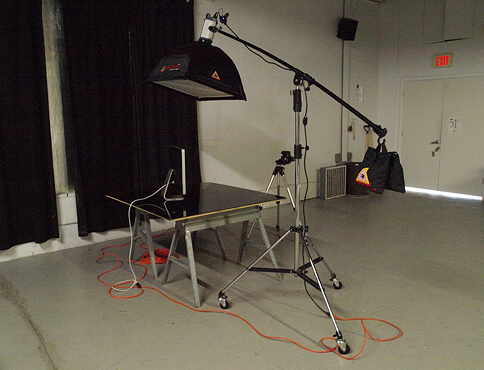
Figure 4
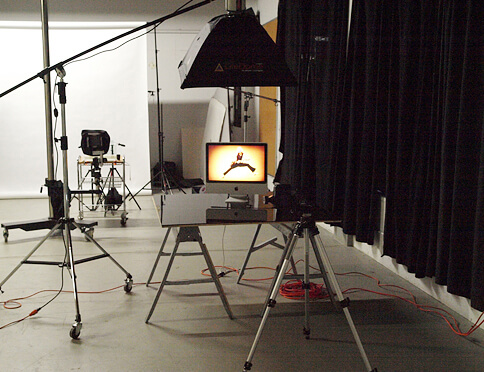
Figure 5
After turning off the house lights to cut down on the light illuminating the background, I zoomed out on the lens somewhat to get a sense of how the light was affecting the scene and took another shot. [Figure 6]
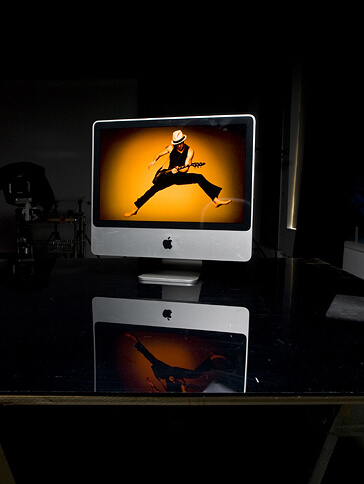
Figure 6
In the result, I saw that the light on the computer was much closer to where I wanted it, but that it still needed a little more finessing. One thing that I noticed right away was that the overhead light was picking up some fingerprints on the top of the screen, so I took a little time to wipe it and the Plexiglas down.
The bigger issue I had to contend with, though, was that overall lighting, while soft and even, was fairly flat dimensionally. To remedy this, I decided to set up two other StarFlash 300 LiteDome Kits and place them on either side of the computer, set back a little for a subtle rim lighting effect. Here’s how the set looked once I got these two other soft boxes set up and positioned. [Figure 7]
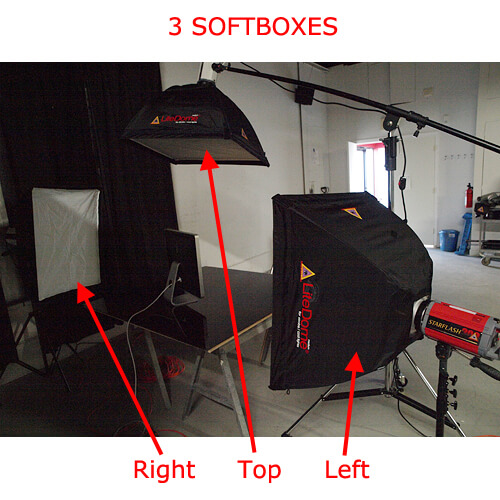
Figure 7
Whenever you add a new light to your set, it’s always a good idea to turn off the other light(s) to get a sense of what that new light is providing. Below (figure 8), you can see results of three lighting configurations:
LEFT: Right soft box triggered only
MIDDLE: Right and Top soft boxes triggered
RIGHT: Right, Top and Left soft boxes triggered
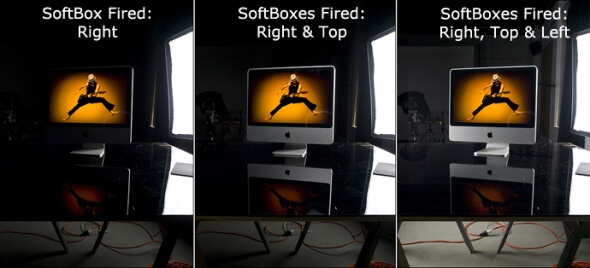
Figure 8
At this point, I was happy with the overall lighting on the computer itself. Next, I had to address the background, which was once again becoming a distracting element of the shot.
I also noticed that the small white stepladder I had positioned near the front of the set (off-camera) was being lit up by the soft box lighting and was reflecting into the lower right corner of the computer screen. So, I promptly moved the stepladder out of the way for the next series of shots.
Creating a Full Black Background
Because the Plexiglas was reflecting the area behind and above it, I realized I needed to place a large black panel in this space to fill that background space. The easiest thing to do would be to set up a 77×77″ LitePanel frame and attach Black LitePanel fabric to it, so that’s what I decided to do.
I set up two LiteStands, placed them on either side of the back area of the set and attached a Main & T Clamp to the top of each stand. I then set up the shock-corded frame into a square, attached the supporting Crossbar and mounted the frame to the two Main & T Clamps. Once the frame was in place, I attached the Black/White fabric so that the black side was facing the set. [Figures 9 & 10]
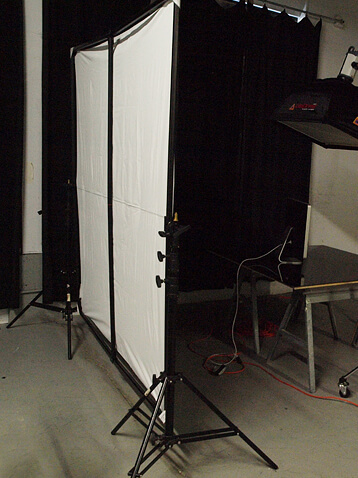
Figure 9
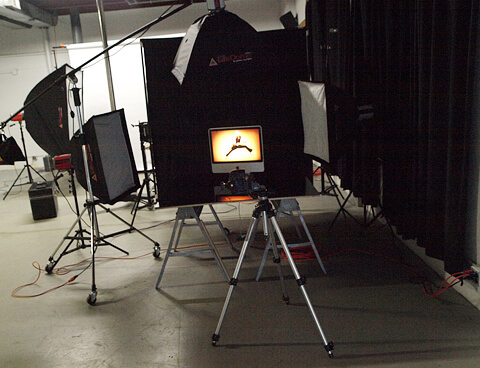
Figure 10
Once everything was in position, I zoomed back in on the lens to create the crop I wanted and took another shot. [Figures 11 & 12]
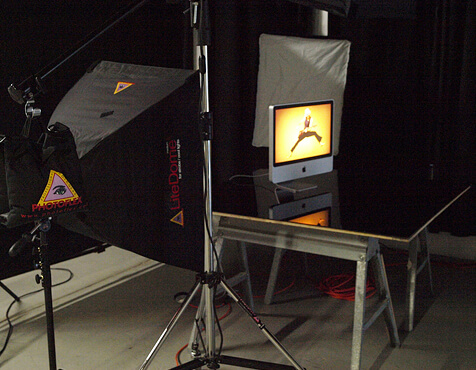
Figure 11
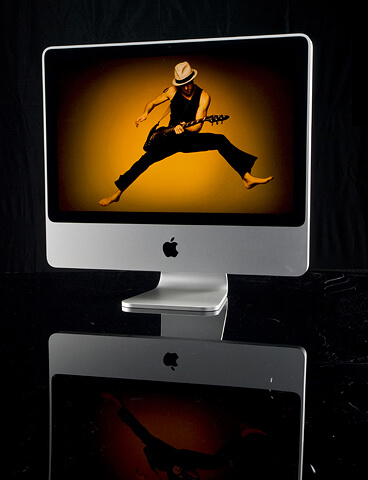
Figure 12
In the result shot, I could see that the LitePanel worked beautifully to black out the background and Plexiglas reflections. There were a few scratches in the Plexiglas that were showing up, but I figured I could clone those out in Photoshop afterward.
TIP: If you plan on buying new black Plexiglas, do your best to avoid scratching it, as those scratches will show up in shots like these!
Adding a Custom Reflection
At this point, I was happy with the overall look of the shot, but thought it might be nice to add a reflection that would both reveal the glossiness of the screen, as well as play off the windmill motion of the guitarist in mid-air.
So as a final step, I set up 32 inch MultiDisc® Kit with the White side of the MultiDisc reflecting into the computer screen. With the MultiDisc secured to the LiteDisc Holder and LiteStand, I was able to position it precisely where I wanted it. [Figures 13 & 14]
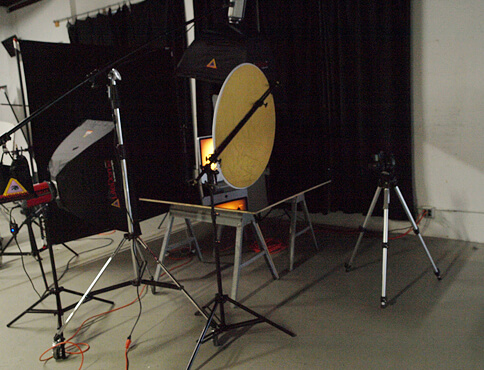
Figure 13
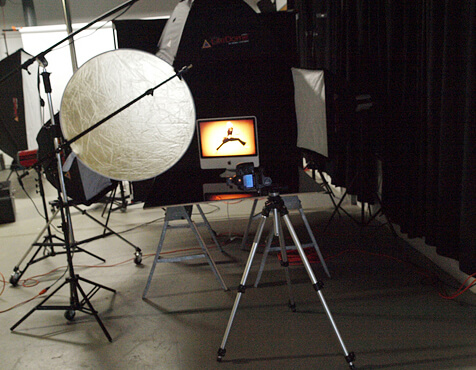
Figure 14
After some trial and error, I finally found a reflection I was happy with. [Figure 15]
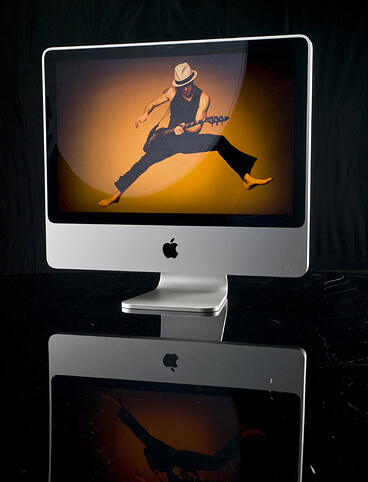
Figure 15
Post-Production Edits
After the shoot, I uploaded the images to this same computer and made some minor retouching edits.
First, I used the Clone Stamp tool to get rid of the scratches in the Plexiglas and smooth out the MultiDisc reflection somewhat.
I then created a black gradient that traveled from the bottom up so that the reflection of the computer would gradually disappear, as opposed to being chopped off abruptly.
And finally, I used the Pen tool to select just the reflection of the computer and then applied a slight Gaussian Blur to this selection. This would help to draw the viewer’s eye more toward the computer and less to its reflection. [Figures 16 & 17]
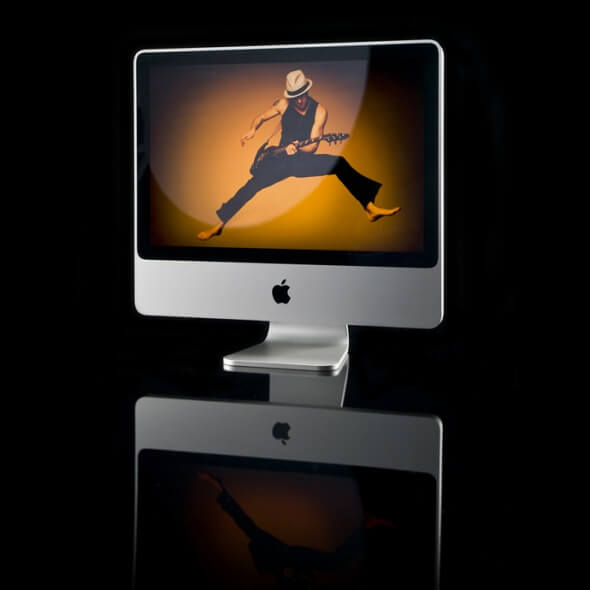
Figure 16
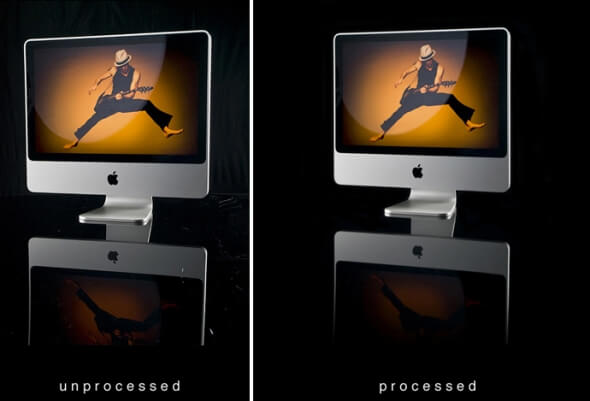
Figure 17
As you can see from the final result, you can create some very dynamic, professional-level product shots using some basic lighting tools and a few digital finishing touches.
—
Written and photographed by Ben Clay, Contributing Instructor for PhotoflexLightingSchool.com.
Lighting Equipment
- Boom
- BoomStand
- RockSteady Bag
- MultiDisc Kit: 32 inch
- LitePanel 77 x 77 inch Aluminum Frame
- LitePanel Accessory – Crossbar 77”
- LitePanel Fabric White/Black 77 x 77 inch
- LiteStand: large


BÌNH LUẬN
02 May 2015 @ 9:41 am by Nghĩa
17 May 2013 @ 5:42 am by tamtam
17 May 2013 @ 5:42 am by Gia Nguyễn