Lighting Angular Features
Lighting is a game of angles – angles of incidence, angles of reflectance – it’s a bank shot on a billiards table where light is the photographer’s cue ball.
When it comes to portraits of the follicly challenged, this whole subject of angles can make for a particularly tricky shot; however, out of respect for my friend, guitar guru and subject du jour, Peter Clark, this is where the analogy to cue balls must end.
My name is Craig Pulsifer and I’m a commercial photographer based out for British Columbia, Canada. For me, the trick to a great portrait is to capture ‘the reveal’ – that flash of defining character that sets your subject apart from anyone else – and one of the first steps of that is to isolate them from whatever background you’re working with, which this lesson examines.
Topics Covered:
- Angles of Incidence, Angles of Reflectance
- Portrait Setups
- Kicker Lights
- More Art than Science
- Summary
Angles of Incidence, Angles of Reflectance
The angle of incidence is essentially the angle that light strikes a subject. The angle of reflectance is the angle at which light reflects or bounces off of the surface that it strikes.
With purely flat and shiny surfaces (Fig.1), the angle of incidence will equal the angle of reflectance; but in practical terms, the surface itself will also determine how light will reflect or bounce from it. The brighter and smoother the surface, the more the light will bounce straight. Conversely, the duller and rougher and the surface is (Fig.2), the more the light will be absorbed and scattered as it reflects.
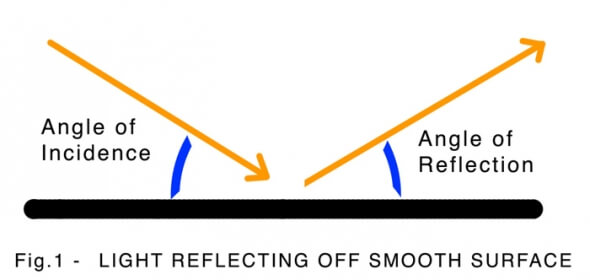
Figure 1 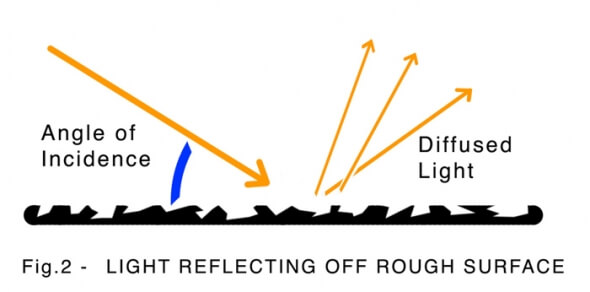
Figure 2
So, bouncing light is not just about angles and intensity, but about surface reflectance as well. Rough surfaces tend to absorb light and smooth surfaces bounce it (i.e. hair lights work best on those who have hair). Hmmm… hold that thought.
I have a marvelously weathered brick wall in my current studio that accentuates Peter Clark’s chiseled stone features, but brick walls have a lot of vertical and horizontal lines that subjects can quickly get lost in. To fit the image that I was pre-visualizing, I needed a telephoto lens with a wide aperture to compress (zoom) the scene and have a blurry background (bokeh). For this shoot, I used a 70-200mm / f 2.8 lens.
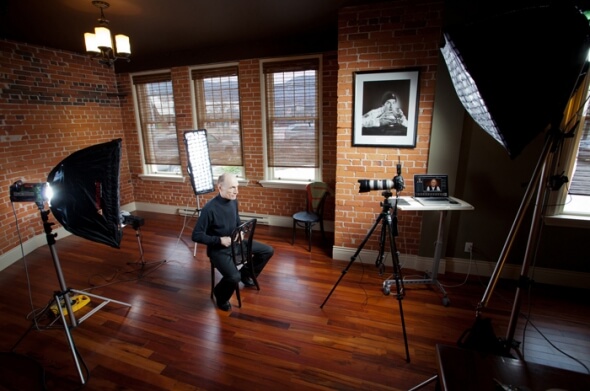
Figure 3
Portrait Setups
A typical three-light portrait set up involves a main or key light, a background light and a hair light to further separate the subject from the background.
Typically, one must light the background a stop or two dimmer than the subject and then cut the subject “out of the background” by back lighting the subject, often with a ‘hair light’ mounted high and behind the subject. Lighting the background is easy with a simple strobe and a store bought or homemade grid or snoot.
Hair lights, on the other hand can be more complicated – especially on bare skin because direct light can create glare (specular highlights), which in this case, will draw attention away from the facial features that define our subject.
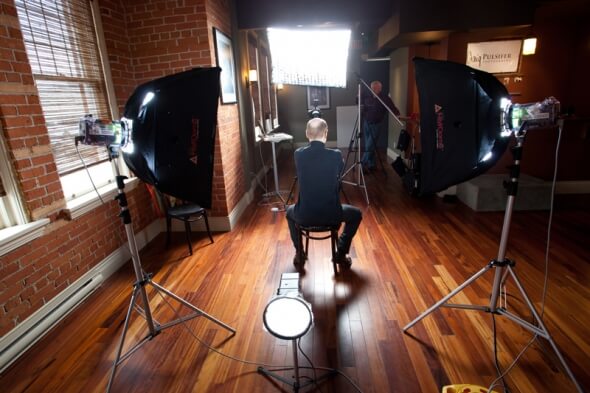
Figure 4
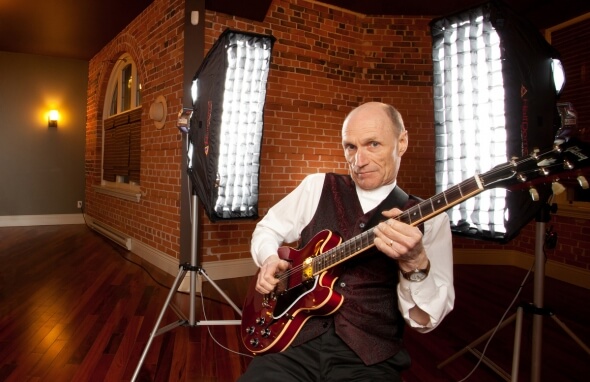
A Large MultiDome soft box with Grids was used as the primary light source for my subject. Oddly enough, this light source acted as much as a fill light because of the very strong and dramatic rim lighting that the small HalfDome soft boxes provided. Likewise, it was the older, less adjustable background light that determined the settings for the digitally adjustable main and kicker lights.
Figure 5
A very old 2-power mono light with neutral density filters and a grid spot were rigged as the background light. Nothing fancy here, but the lack of adjustability of this light source meant that all other lighting adjustments had to be made relative to this older strobe.
Kicker Lights
For this portrait, I decided not to use a hair light to avoid glare on the top of the head and introduced accent lights to either side of the face to retain separation of the subject from the background and highlight Peter’s facial features. Rather than use a bare (point source) flash that would create a serious hot spot wherever it was pointed, I chose a narrow soft box (“strip light”) to spread diffused light along the length of the subject’s head and shoulders.
Photoflex’s Small HalfDome was the obvious choice. The face of the small HalfDome is 34×10 inches. It features a white interior with an interior baffle and diffusion face, both of which can be removed for high-contrast lighting in seconds. It features patented QRC (Quick Release Corners), comes with a removable strip mask for smaller applications (handy for product shoots), and boasts a 6 year warranty, which is a long time for a soft box. [Figure 6]
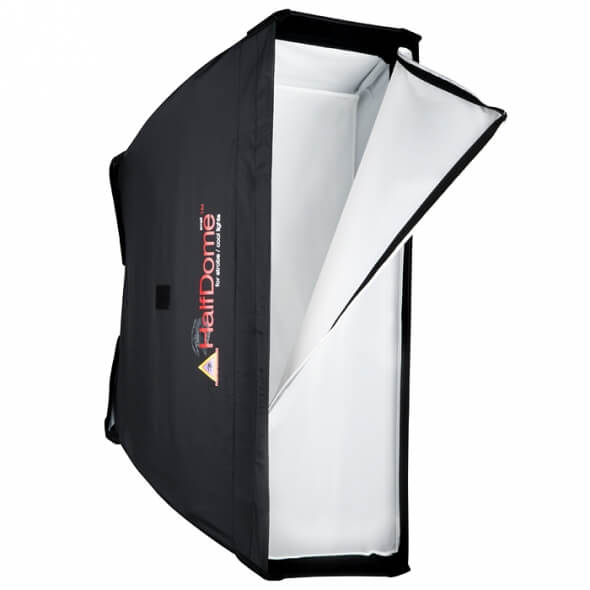
Figure 6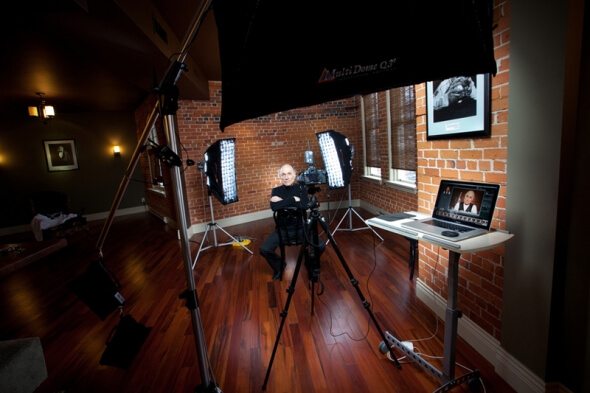
Figure 7
Figure 8
A pair of Small Photoflex HalfDome softboxes mounted on 300Ws mono lights create a long strip of light, wrapping around the face of the model. Eggshell grids cover the front diffusion panel of each HalfDome to direct each light forward toward the model. This prevents stray light from spilling into the camera lens, which would ruin the image with lens flare.
More Art than Science
But here’s the catch… working rim light involves guesswork. Outside of a bunch of lighting ratios and rough rules of placement, there are no magic formulas that I can offer. You’re stuck in the same boat as the rest of us and left to wing it based on your own personal taste – and that, by the way, is a good thing.
Portraiture is a subjective and often iterative process of trial and error and this is a luxury that the digital age has taken from Polaroid and given to us all. Back in the day, the veterans used to shoot many Polaroid ‘tests’ just as we do with digital today. The only difference that I know of is that they didn’t have the advantage of a histogram to evaluate high/low clipping AND they used to mark up and charge clients for each Polaroid taken. We now we call it “chimping” and we do it for free. But, hey, that’s progress.
In this example, chimping showed important detail was blown out of the highlights – detail that will undoubtedly take time and effort to restore in post and ultimately be a compromise. The solution was to use the inverse law of light and halve its intensity by doubling the distance between source and subject (yes, I just moved the light back) – oh, and moved it slightly farther behind the subject, which in hindsight, I wish I hadn’t done because I lost some of the highlights around the mouth, which are tough to recreate. [Figures 9, 10 & 11]
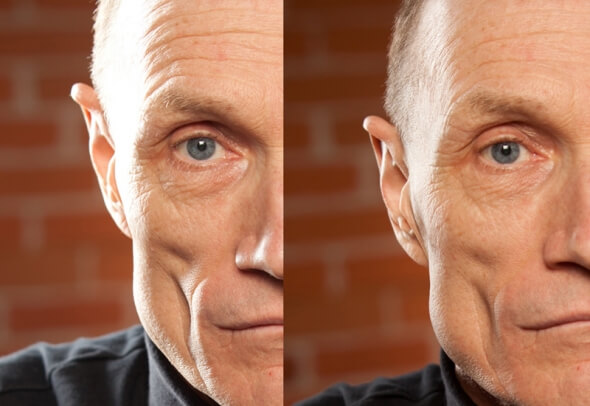
Figure 9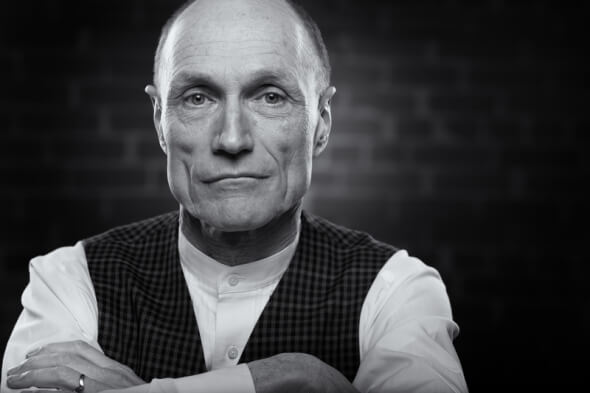
Figure 10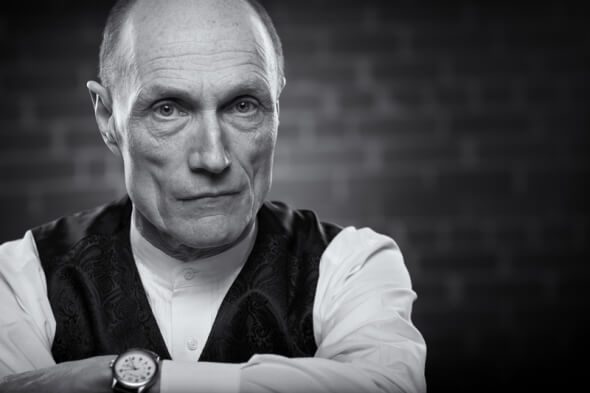
Figure 11
Summary
So, what’s the take away? For me, I’m learning that it is better to do things right the first time than to monkey around with files in post production. Yes, you can fix some mistakes in Lightroom or Photoshop, but so can your Aunt Clara and the really bad stuff will wind up looking flat and grey just like Aunt Clara, so don’t do it.
The moral of the story is to choose your gear wisely and use it well to achieve results in-camera that match what you pre-visualized prior to the actual shoot. Don’t worry, you’ll still get to spend way more time than you want to in post production, but at least you’ll have the data to play with.
By the way, outside brick walls work as well for this as inside brick walls. Happy shooting!
—
Craig Pulsifer is a world-beat visual storyteller specializing in commercial lifestyle. He has a wife, 5 kids, a dog and a mortgage, all based in British Columbia, Canada.
Lighting Equipment
- MultiDome: large
- Large SoftBox Grid
- HalfDome®: small
- Small SoftBox Grids for HalfDome


BÌNH LUẬN
02 May 2015 @ 9:41 am by Nghĩa
17 May 2013 @ 5:42 am by tamtam
17 May 2013 @ 5:42 am by Gia Nguyễn